Create Your Personalized Edge
Create Your Personalized Edge
Upload a photo of your hand to generate a custom-fit climbing edge.
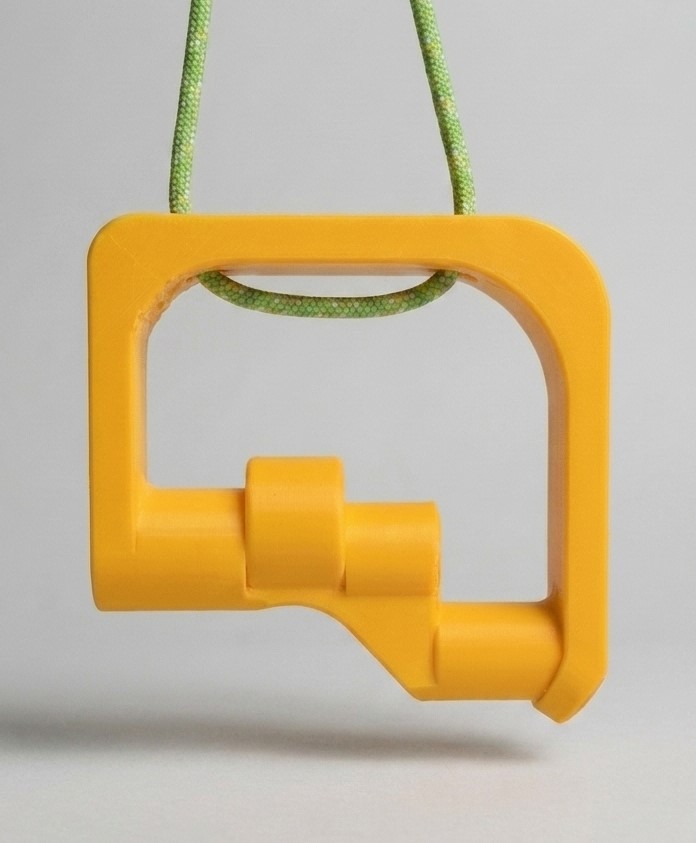
How it works
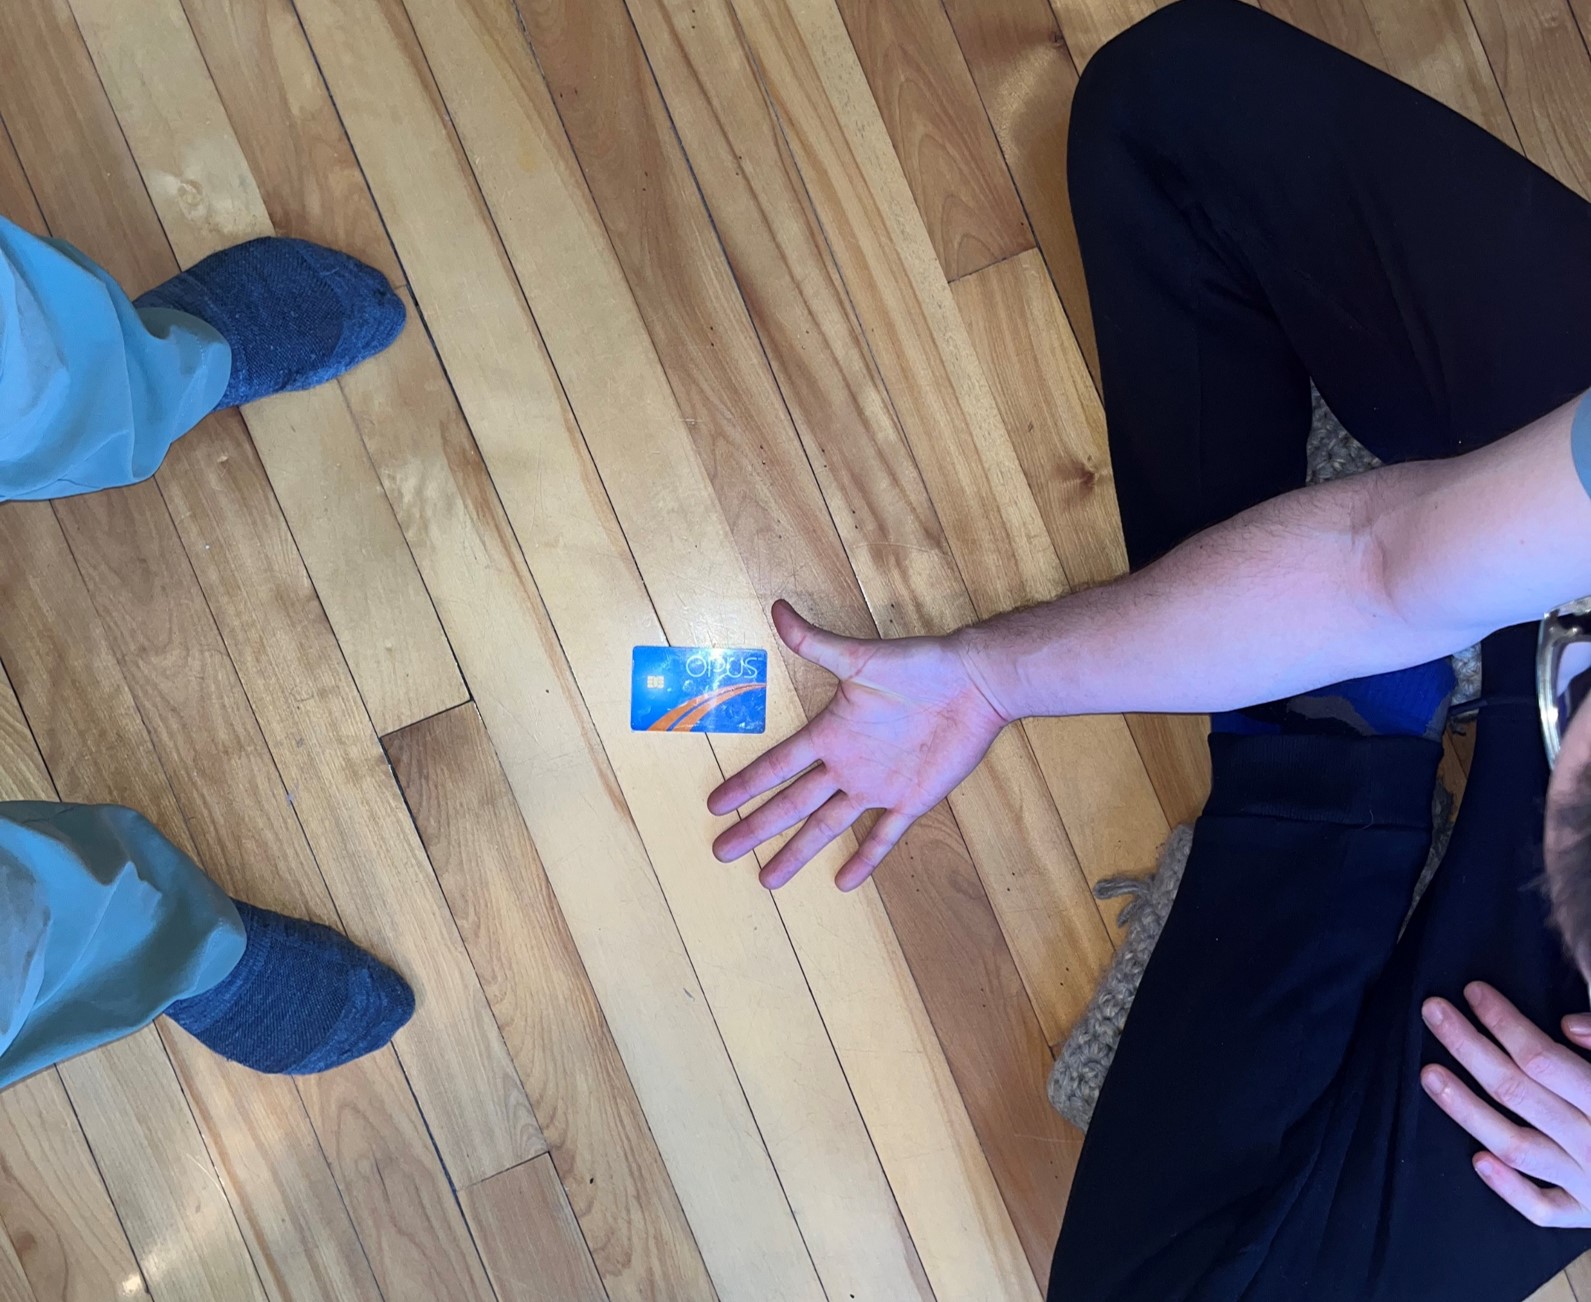
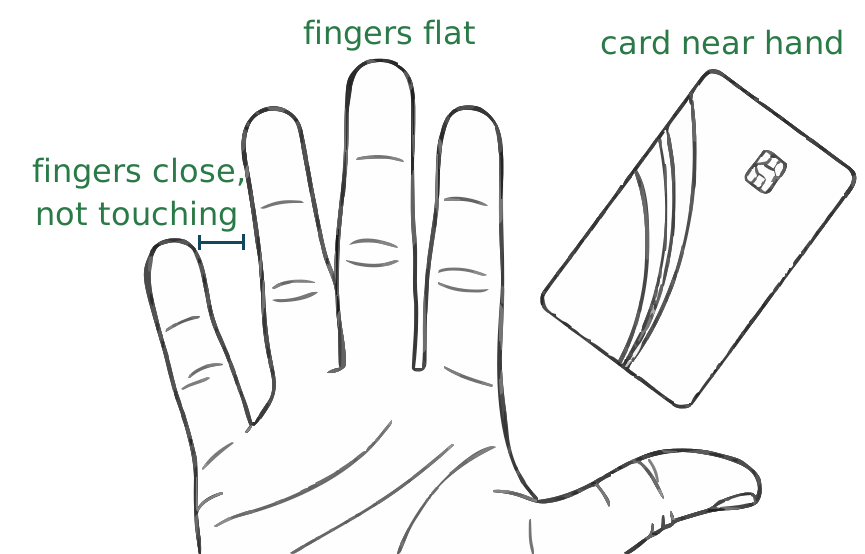
- Place a credit-card-sized card on a horizontal surface (do not show any sensitive information).
- Place a single hand flat near the card, without touching it.
- Keep fingers close, with a small gap between the fingertips, palm facing up.
- Make sure all 4 fingers are flat — all joints and tips in contact with the surface.
- Hold the phone roughly 1 m above the hand, parallel to the surface, centered on the hand.
- Use a flash. If you don't see the creases in the photo, the software won't either.
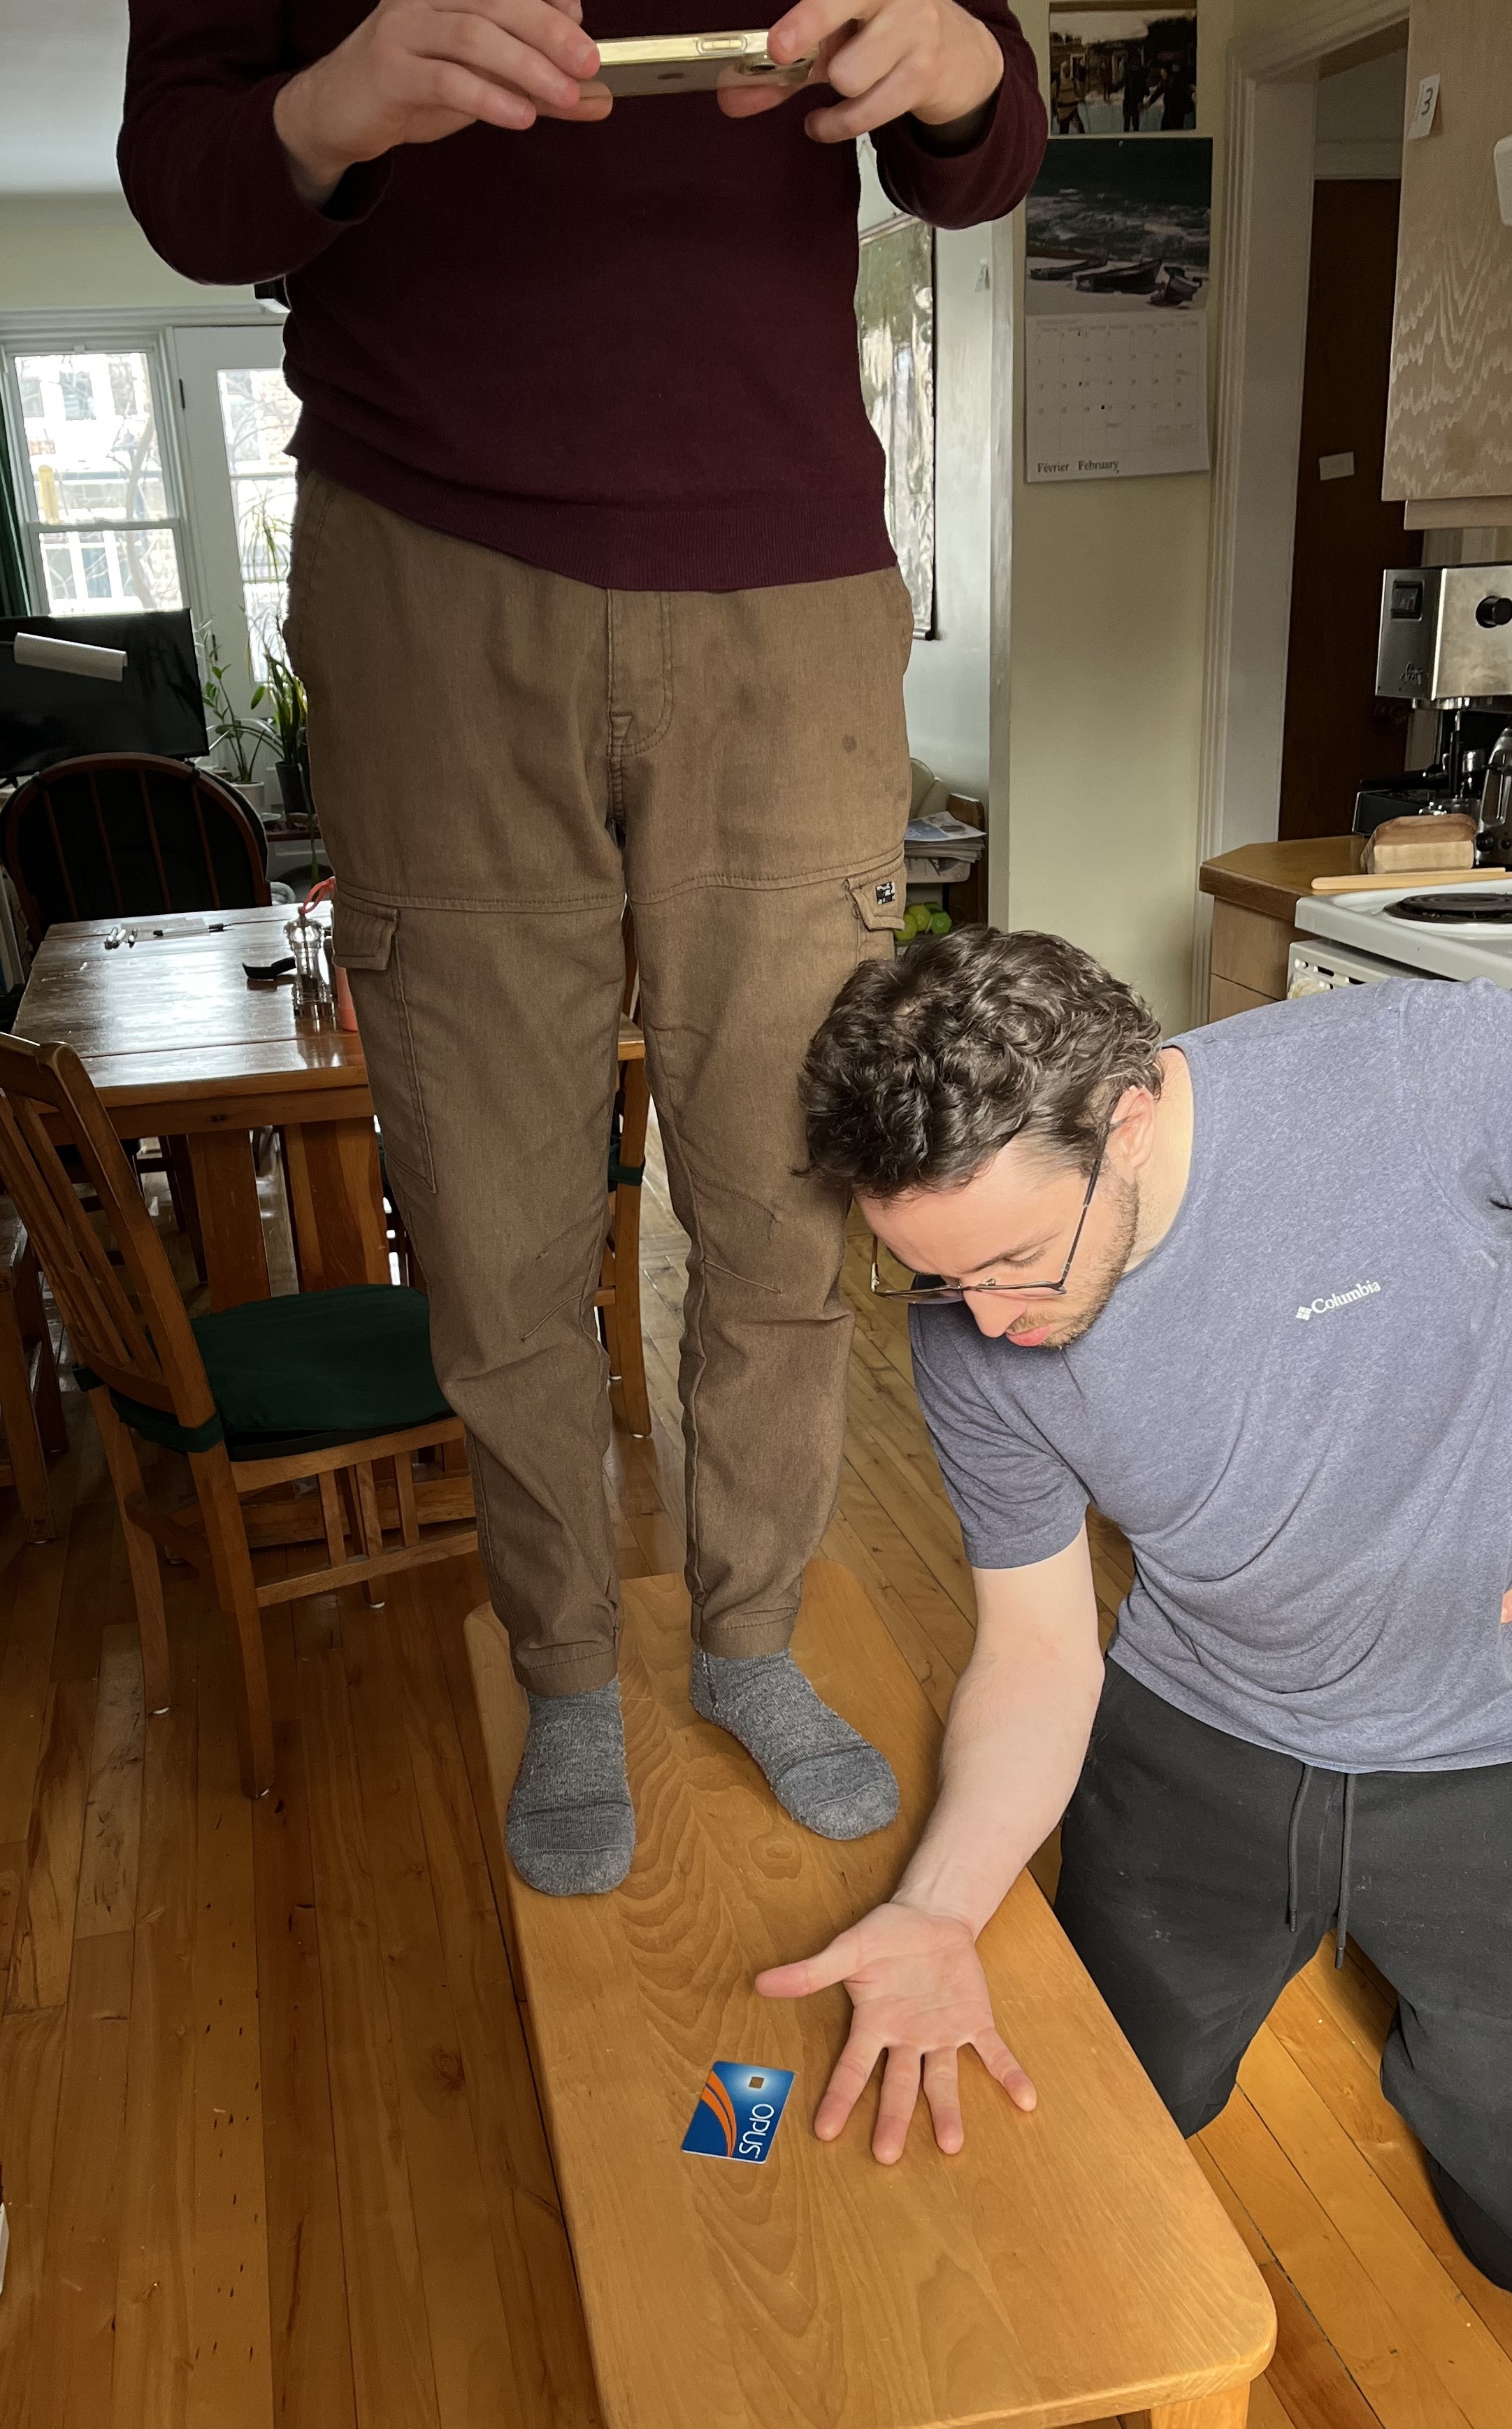
✓ Good — phone above, parallel to the surface
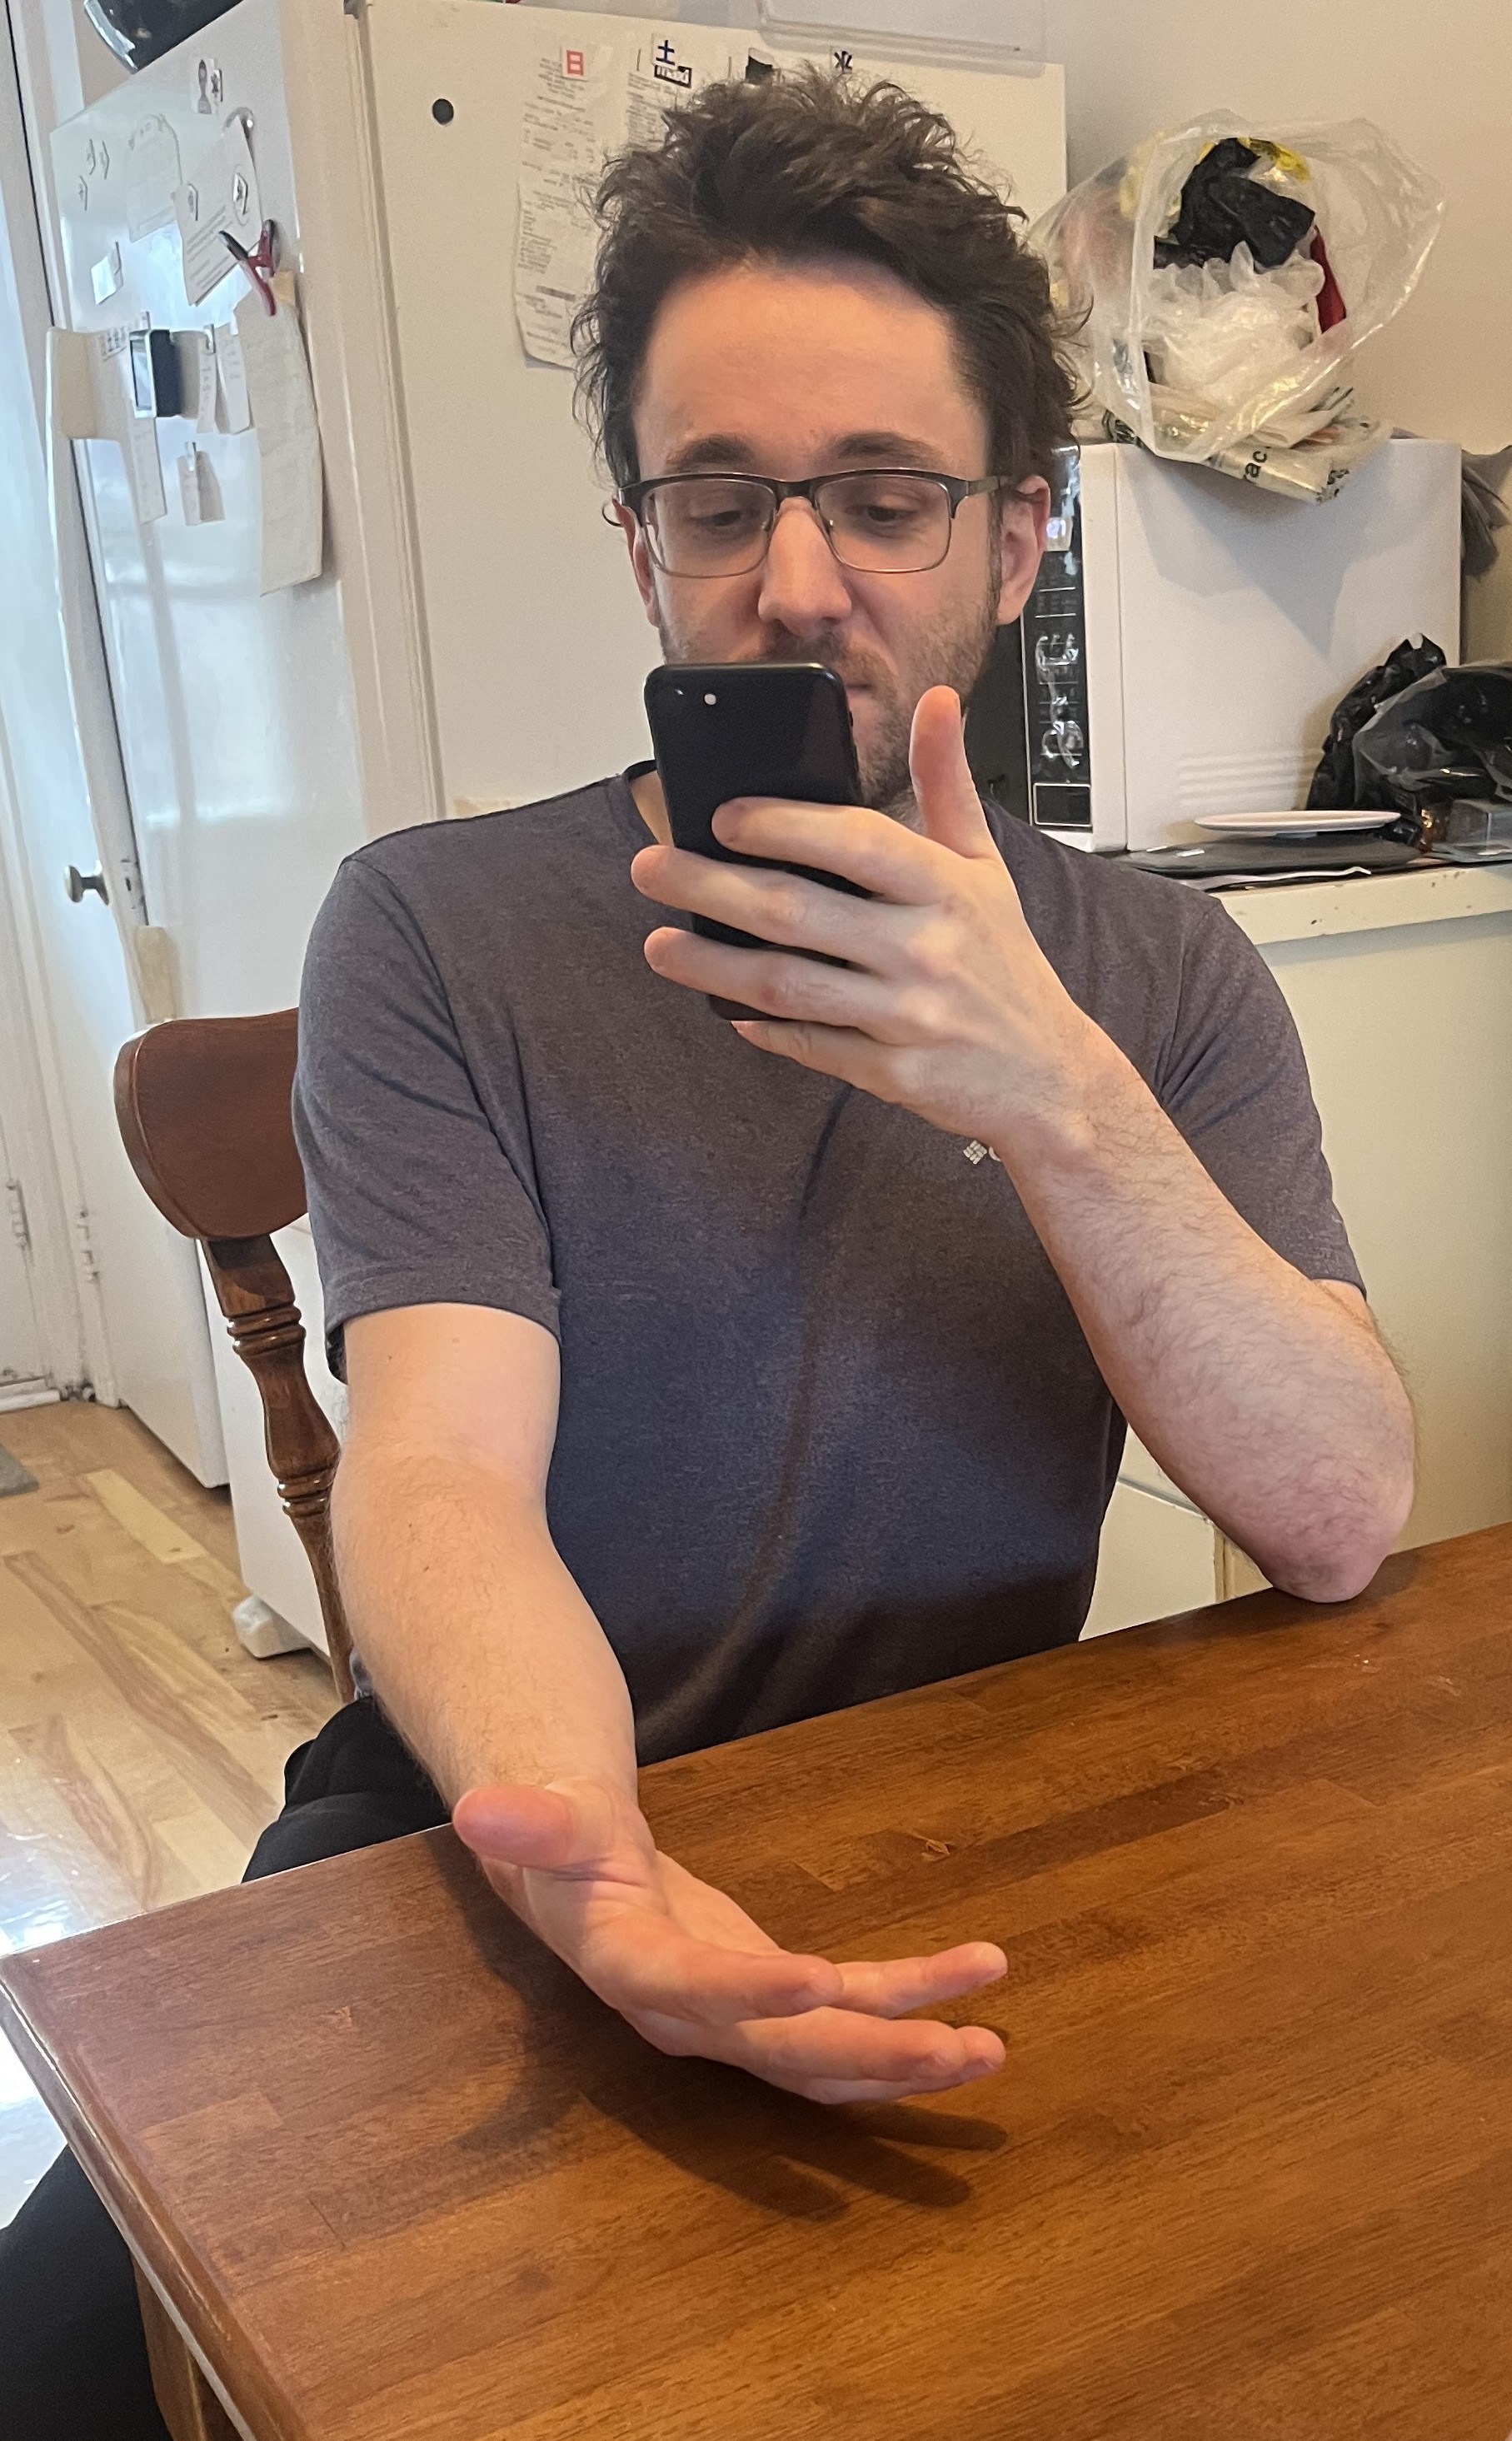
✗ Bad — too close, angled shot
Tips for a good photo ▸
- Use your phone's highest-resolution camera (12 MP+).
- Avoid notched or irregularly shaped cards.
- Exact distance is not critical, focus on keeping the phone parallel and centered.
- Prefer optical zoom — avoid digital zoom.
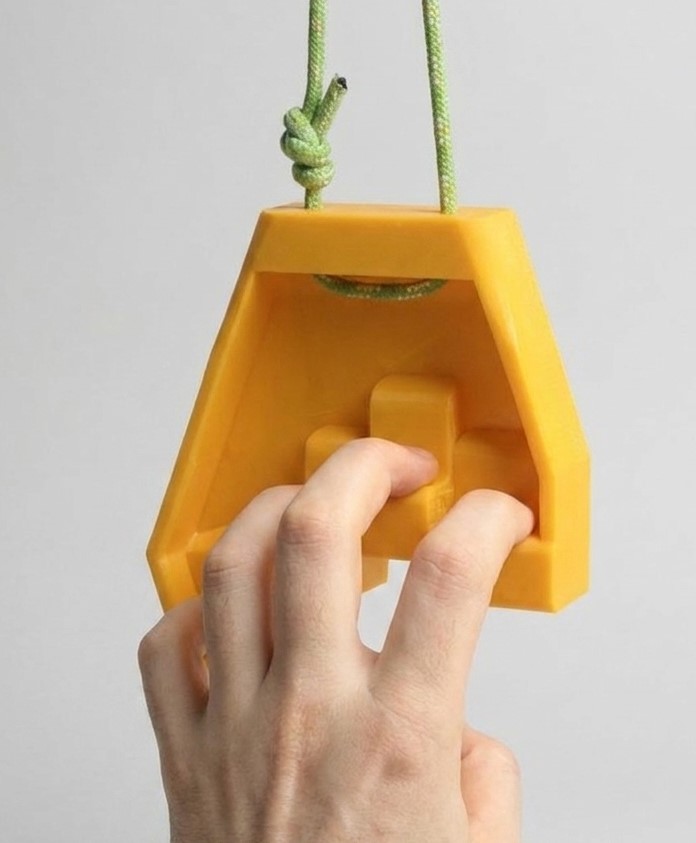
A fully automated pipeline that generates a custom 3D-printed climbing edge from a single hand photo. Computer vision software measures your hand and a unique geometry is generated for you.
Since hand morphology varies significantly between climbers, a standard edge puts every user's fingers in a different position, often into hyperextension or causing uneven joint loading. This custom edge puts every finger in the same position.
- Consistent joint angles: comfortable, healthy joint positioning across all morphologies.
- Secure grip: the geometry keeps fingers in place without chalk while form is maintained.
- Longer sets: the comfortable geometry and the grip let you hold 30s+ sets, bringing finger training into the time-under-tension ranges used in tendon rehab and hypertrophy protocols, compared to the 6–10s a standard edge allows.
- Targeted recruitment: open-hand or crimp-specific training (FDP or FDS muscles respectively), with effective pinky engagement.
- Warmup: the fit keeps a cold-to-max ramp comfortable each session.
Computer vision is used to locate the creases of the hand. It runs in three steps:
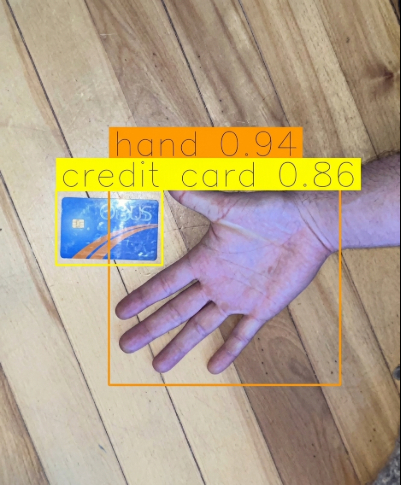
- Detect the credit card. It calibrates the image in mm per pixel along two axes, using PCA.
- Detect the hand in the image and reframe the image around it.
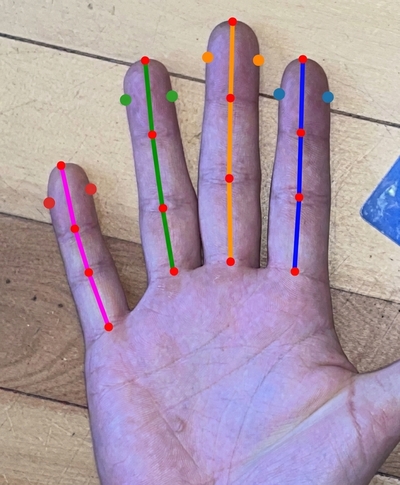
- On the reframed image, detect the creases of each finger.
The detector finds skin creases, but the CAD model needs joint locations in standard positions. The distance between a crease and its joint varies with the finger and the joint. I derived per-finger joint positions from published anatomical measurements. The trainer is dimensioned to those positions, not to the fold you can see.
Your photo does not have to be perfect, or taken in an exact pose. Finger splay would otherwise propagate straight into the printed part. Past a certain splay the software rotates the finger about the knuckle it estimated, back to a standard angle. You can see this in the annotated reference image (if your fingers are splayed enough).
Most of the code is checking. The measurement itself is the simple part. The rest detects problems: an occluded card, more than one hand or card in frame, bad crease detections, too much camera angle, a photo taken from too close.
Accuracy: Across a test set of 40 people, the creases are located to 0.9 mm on average, compared to my manual annotations of the images.
Repeatability: Photographing one hand eleven times, the measurements vary by 0.6 mm on average. Most of that spread comes from how the hand is posed between photos: splay of the fingers, hand being flat, etc.
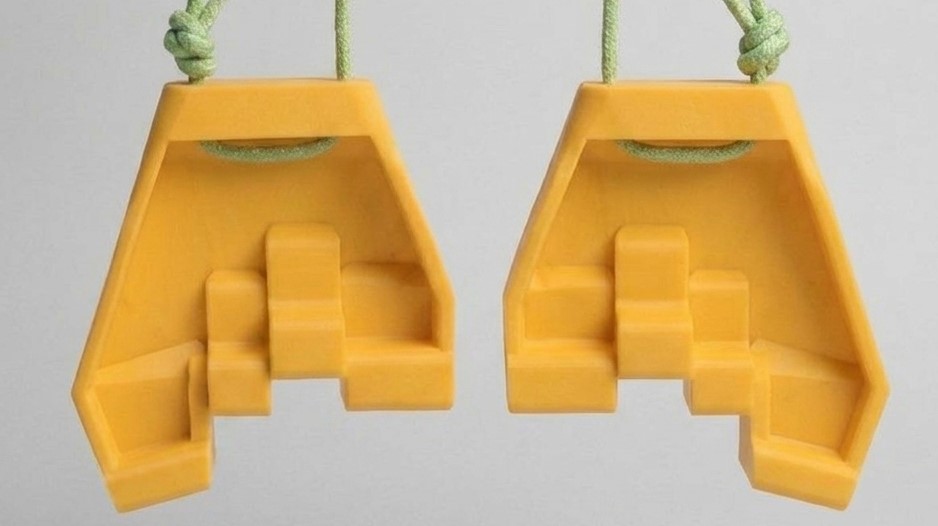
Mainly recruits the Flexor Digitorum Profundus (FDP), the muscle that flexes the fingertip joint (DIP). It does so while keeping pulleys within a safe range, which makes it a good choice for rehab, prehab, and long sets. In climbing, the FDP engages whenever you're in an open-hand position, digging into a small hold, or otherwise flexing the fingertip.
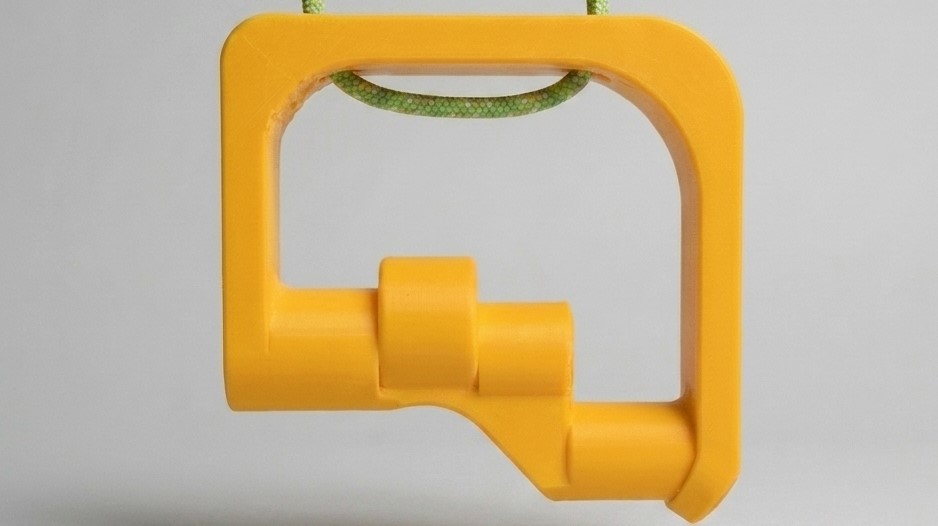
Recruits the Flexor Digitorum Superficialis (FDS), the muscle that flexes the middle finger joint (PIP). This puts the fingers in a strong position, so the Crimp model holds more load. A single symmetric part works on either hand. In climbing, crimping emphasizes the FDS, particularly in a full crimp.
Open Hand Position
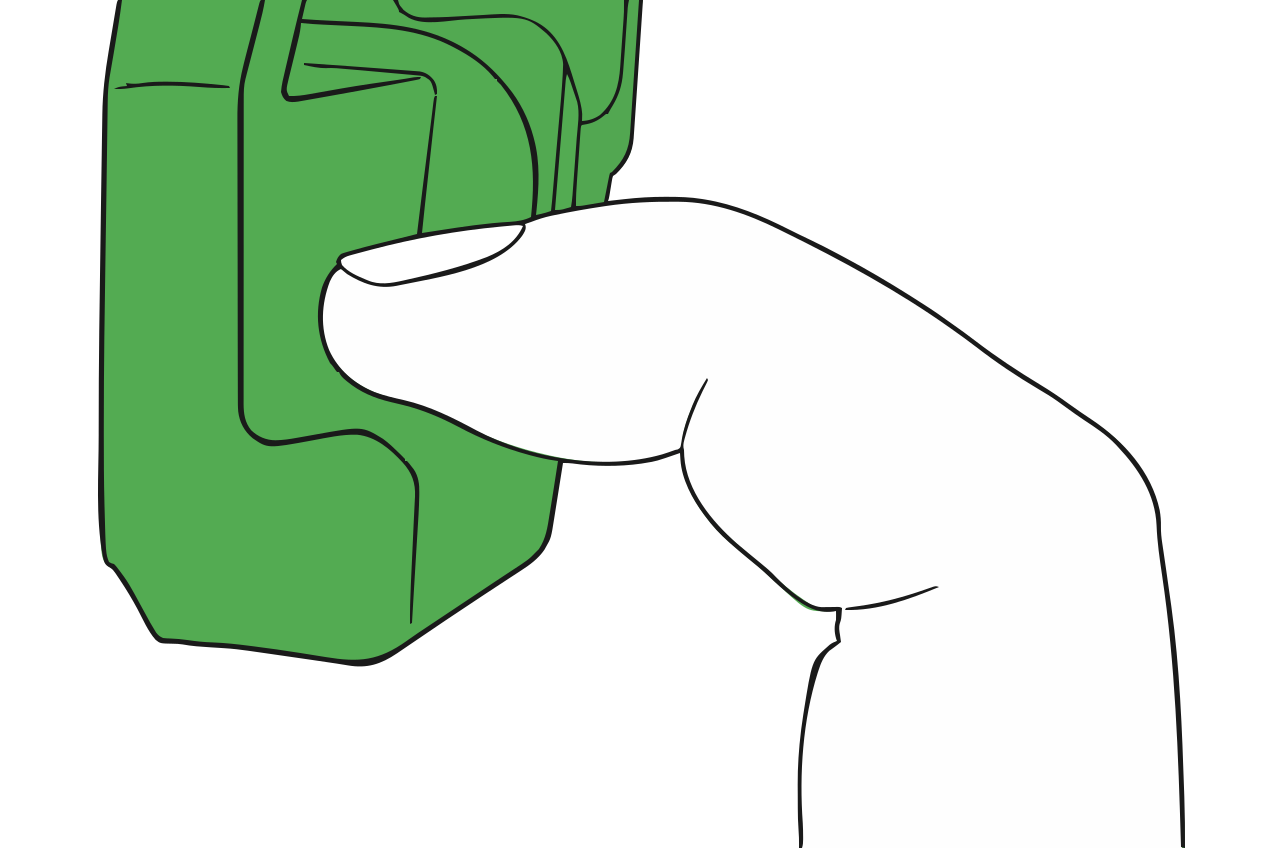
A different position may allow heavier weight but increases injury risk.
Crimp Position
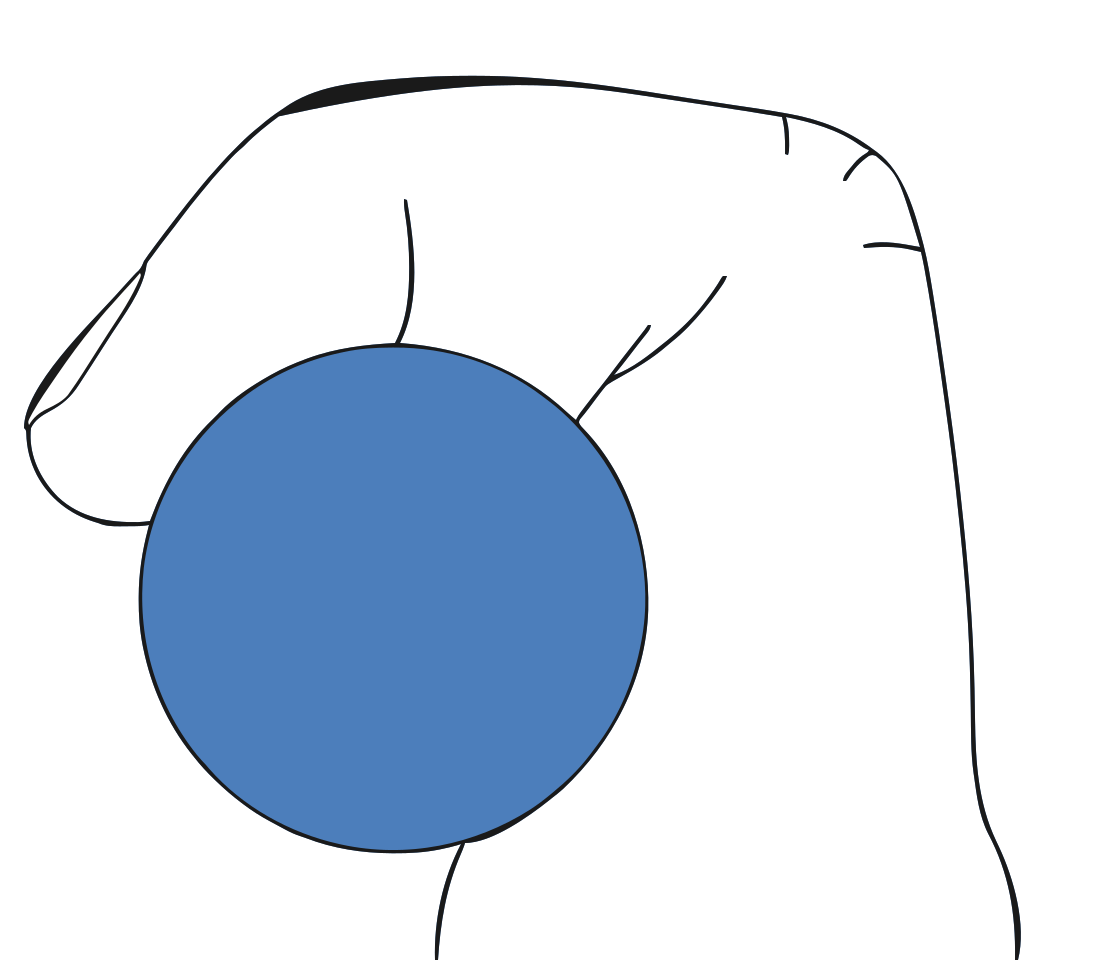
Training Protocol
- Volume: 3 sets of 30–240 seconds.
- Onboarding: Start slowly without reaching failure.
- Chalk: Do not use — slipping means you can't maintain proper form.
Open Hand Troubleshooting
- Crimp Compensation: Reduce intensity and focus on form.
- Pinky Curling: Try moving the pinky laterally along the edge. The curl may actually be due to the ring finger crimping (weak FDP), effectively bringing the pinky hold up.
Crimp (FDS) — up to your bodyweight recommended load
- Infill: 100%
- Material: PETG or PLA
- Orientation: Default
- Support: Auto · manual for stability
Show example
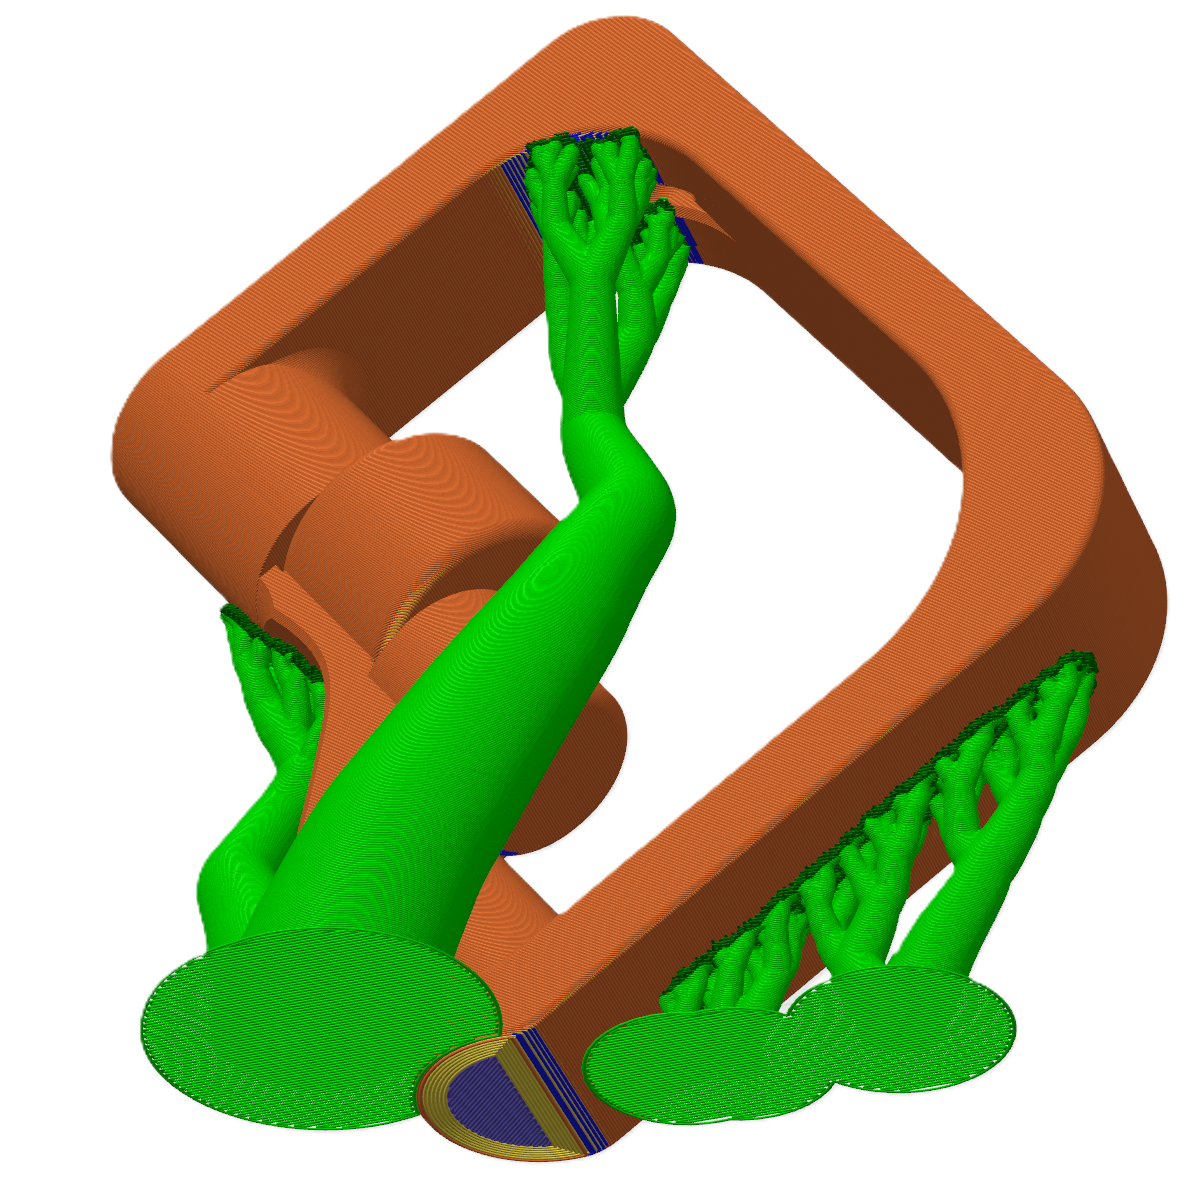
Manual supports (green) added under the trainer for stability on the bed.
Open Hand (FDP) — up to 60 kg recommended load
Lower due to the weaker recruited muscle.
- Wall thickness: 1.7 mm
- Infill: 20%
- Material: PETG or PLA
- Orientation: Flat or default
- Support (Flat): None
- Support (Default): Auto
Flat is easier to print and has too much friction, while default is more comfortable and better overall.
Cord
- Rig with accessory cord at the diameter you entered: thread it through the trainer and close the loop with a fisherman's knot or a figure-eight loop.
Safety
- Material: PETG is generally preferred over PLA for engineering use. It has a longer shelf life and holds up better in humid environments, though either will make a functioning part.
- Open Hand model: heavily over-engineered — failure is extremely unlikely.
- Crimp model: dimensioned for a 5× safety factor over your bodyweight and set at a strengthening angle to account for variations in print quality and degradation over time. Warning: Lowering the infill below 100% for Crimp model leads to unpredictable strength. This model depends heavily on wall thickness, which slicers handle inconsistently in tight corners.